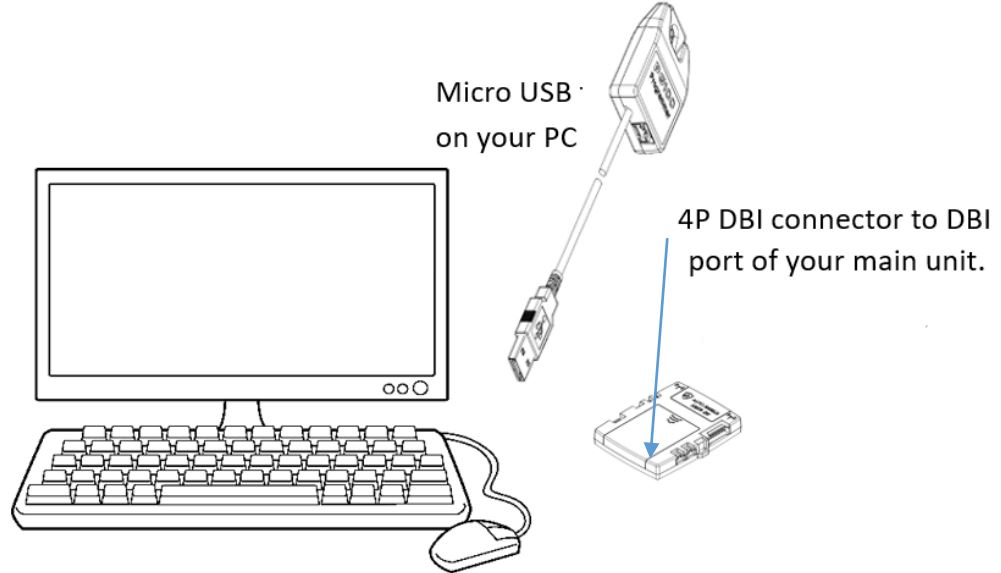
Programmer
CPU: P4 3.0GHZ OR ABOVE
RAM: 1GB OR BETTER
NET FRAMEWORK: 4.0 OR ABOVE
01: Download Driver
For XP PC’s SP3 and above click start, My Computer, system tasks and view PC information. If 64 bit appears, use the 64bit Dongle Driver. All other XP PCs use the 32Bit Dongle Driver.
Download and install the Dongle Driver for your X86 or X64PC.
02: Download Web Component
Once the installation of both the driver and web component is complete reboot your computer.
Log onto the www.autoshieldsecurity.com and select detect device. The application will detect the product connected to your PC and will allow you to select software update only if software is available for the unit you are programming.
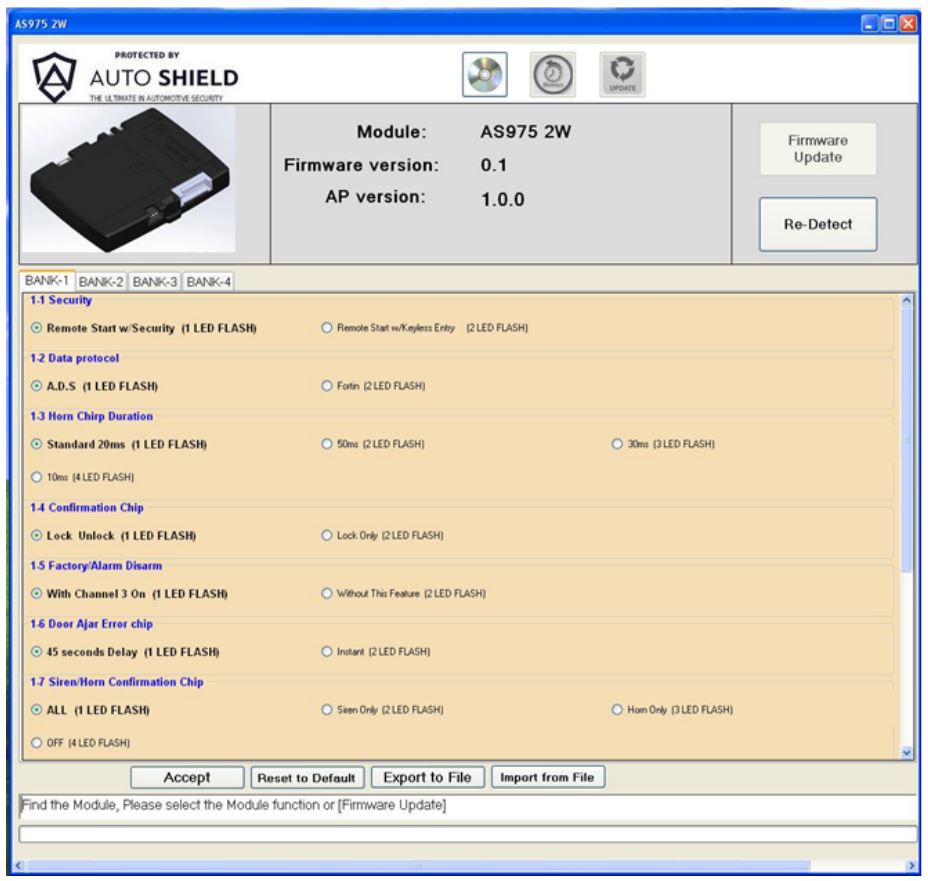
You will see the feature selection screen allowing you to select / set features of the system. For example (AS975-2W) shown on the following pages.
Simply move your PC’s cursor over to an item you want to select / change and click the left mouse button. The highlighted area will move from the default position, to your selection.
Once you have made all the changes you want for the system, select “Accept” to have the changes take effect in the connected module.
You also have the option to save the file to your PC for use at a later time, simply selected “Export to the File”, and you will be directed to name and save the preselected feature tables in a location on your PC.
Doing so places the .nle file on your PC where you can reuse these settings for additional units that you may be installing at a later time by selecting “Import from the file” going to the saved file and selecting it.
After you have finished with your programming, saving of files, etc., simply log out of the application.
Click on Re-Detect button on PC screen, it will re-detect the connected module automatically and proceed with programming and flashing firmware updates if they are available for the module you have connected.

You can select features you want to change by clicking on any box of the feature chart. The Gray will change to the selected box. Once you are through with your selections in Bank you can move on to the next bank for the feature program you want.
Note: DO NOT disconnect the module until you get the “Flash Success” message displayed on your PC’s screen.

OS: Windows XP SP3 or Above.
CPU: P4 3.0GHZ OR ABOVE
RAM: 1GB OR BETTER
NET FRAMEWORK: 4.0 OR ABOVE

